Shotokan Karate Classes
Affordable Not-for-Profit Karate Training for our Youth
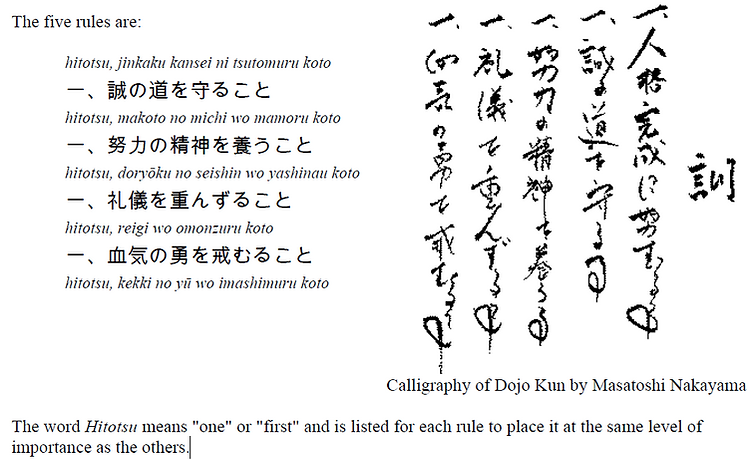
DOJO KUN - Rules of the Dojo
Generally accredited to Gichin Funakoshi though rumored to have been created by Sakugawa, the Dojo Kun serves as a set of five guiding principles, often recited at the end of each Shotokan Karate training session at many schools, intended to frame the practice within an ethical context.
Generally, the English translation states:
-
Each person must strive for the perfection of one's character
-
Each person must be faithful and protect the way of truth
-
Each person must endeavour (fostering the spirit of effort)
-
Each person must respect others and the rules of etiquette
-
Each person must refrain from violent behavior (guard against impetuous courage)
The Japanese Karate Association simplifies this to:
-
Seek perfection of character
-
Be sincere
-
Put maximum effort into everything you do
-
Respect others
-
Develop self-control


How to Tie Your Belt
While the belt signifies your relative standing in your Karate progression, remember that the belt itself simply holds your pants up. It is the student’s continued spirit & perseverance that will provide them the path to mastering the art and becoming an individual who respects themselves and others
There are 2 ways to tie your karate belt. The first the ‘wrap-around’ method produces a cleaner look w/ the belt in 1 straight line in the back. The 2nd is the ‘front-to-back’ method which creates a belt overlap in the back. Both methods are acceptable and are outlined below
‘Wrap-Around’ Method (See corresponding pictures)
-
Step 1: Hold the belt in front of you and place a portion of the belt on your hip. Then wrap the belt around your body.
-
Step 2: Continue to wrap the belt around your body until equal lengths are achieved as in the photo.
-
Step 3: Place your right length over the left length and then under and over the belt.
-
Step 4: Fold the belt over and hold the two lengths as in the photo.
-
Step 5: Place the left length over the right.
-
Step 6: Now wrap through the centre hole
-
Step 7: Then pull the belt as tight as possible.
‘Front-to-Back’ Method (See corresponding pictures)
-
Step 1: Fold your belt in half and find the center. Place the centre on your stomach just below your navel.
-
Step 2: Pull the belt across your belly and to the back. Take the belt on your right side and cross it over the belt on your left side. Pull both ends around to the front. Bring both sides to the centre of your belly. Even the belt all the way around.
-
Step 3: Cross the right side of the belt over the left. Take the right side of the belt and tuck it under the section already around your waist. Pull tight.
-
Step 4: Take the top end of the belt (or the left side now) and bend it over the right side
-
Step 5: Continue to loop the left side under the right side and up and through the hole to make the knot. Pull the knot tight making sure that both ends are the same length.
-
Step 6: The knot should form an arrow shape pointing to your right with both ends are the same length.


Belt Ranking System
Our system, like most others is of numbered ranks which count down from level, or ‘kyu’ 9 to kyu 1 before becoming eligible to test for blackbelt or ‘Shodan’ level. A particular color merely represents the numbered rank that the student has attained via a formal test.
While there is a minimum time period of 4 months between ranks, our philosophy is to test students when they are ready. In most cases the student is already practicing at the level for which they will test. As indicated on the left side of this page, students begin as 9th Kyu (white belt) then progress to 8th Kyu (yellow belt), 7th Kyu (orange), 6th Kyu (blue), 5th Kyu (green), 4th Kyu (purple), 3rd Kyu (brown belt w/ 3 stripes), 2nd Kyu (brown belt w/ 2 stripes), 1st Kyu (brown belt w/ 1 stripe) & then Shodan (black belt level 1).


